These pages outline the work carried out on Destiny reflecting the results of the survey and improvements and upgrades we wished to make. Elling provide a manual which outlines the system on board and the previous owner had a good selection of manuals for most of the equipment. However, there's nothing like getting your hands dirty to really get to know your boat, how it works and how well it was designed and built. I have to say I have been impressed.
Key survey results:
Saildrive Leak
The most pressing job was to address a leak that had been identified allowing water into the Saildrive unit - the drive for the wing (back-up) engine. The Saildrive had recently been removed and, on investigation, it appeared the unit had not been properly reassembled.
Fortunately, the agents who undertook the work agreed to pay for the repair so the unit was removed and dismantled in the local agent's workshop. It became clear that a gasket had been fixed the wrong way around thus allowing water to ingress.

Here you can see the the gasket, in green, is fitted 180 degs out of position.
The company who carried out the original work admitted the "engineer" who did the job had since left!
Fortunately, no more damage occurred as a result of the water ingress.

While the Saildrive was out I took the opportunity to clean up and antifoul
the folding prop using Velox primer and 2 top coats in black.
The last 2 pictures show what a little TLC and time can do


As with many jobs on boats, you solve one problem and another arises. In order to remove the Saildrive the wing engine had to be move forward. In doing this we noticed some corrosion on the heat exchanger where it meets the exhaust elbow. Sadly this was not picked up on the survey. Examination confirmed our fears that the heat exchanger and elbow needed replacing. This was duly done and, for good measure, I also changed the exhaust muffler whose drain plug had been broken off and been glued into place. Perhaps a reason why the heat exchanger corroded!
We now have complete faith in the wing engine and ancillary components.
Generator tidy up
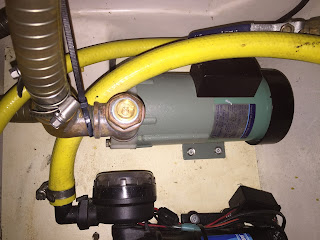
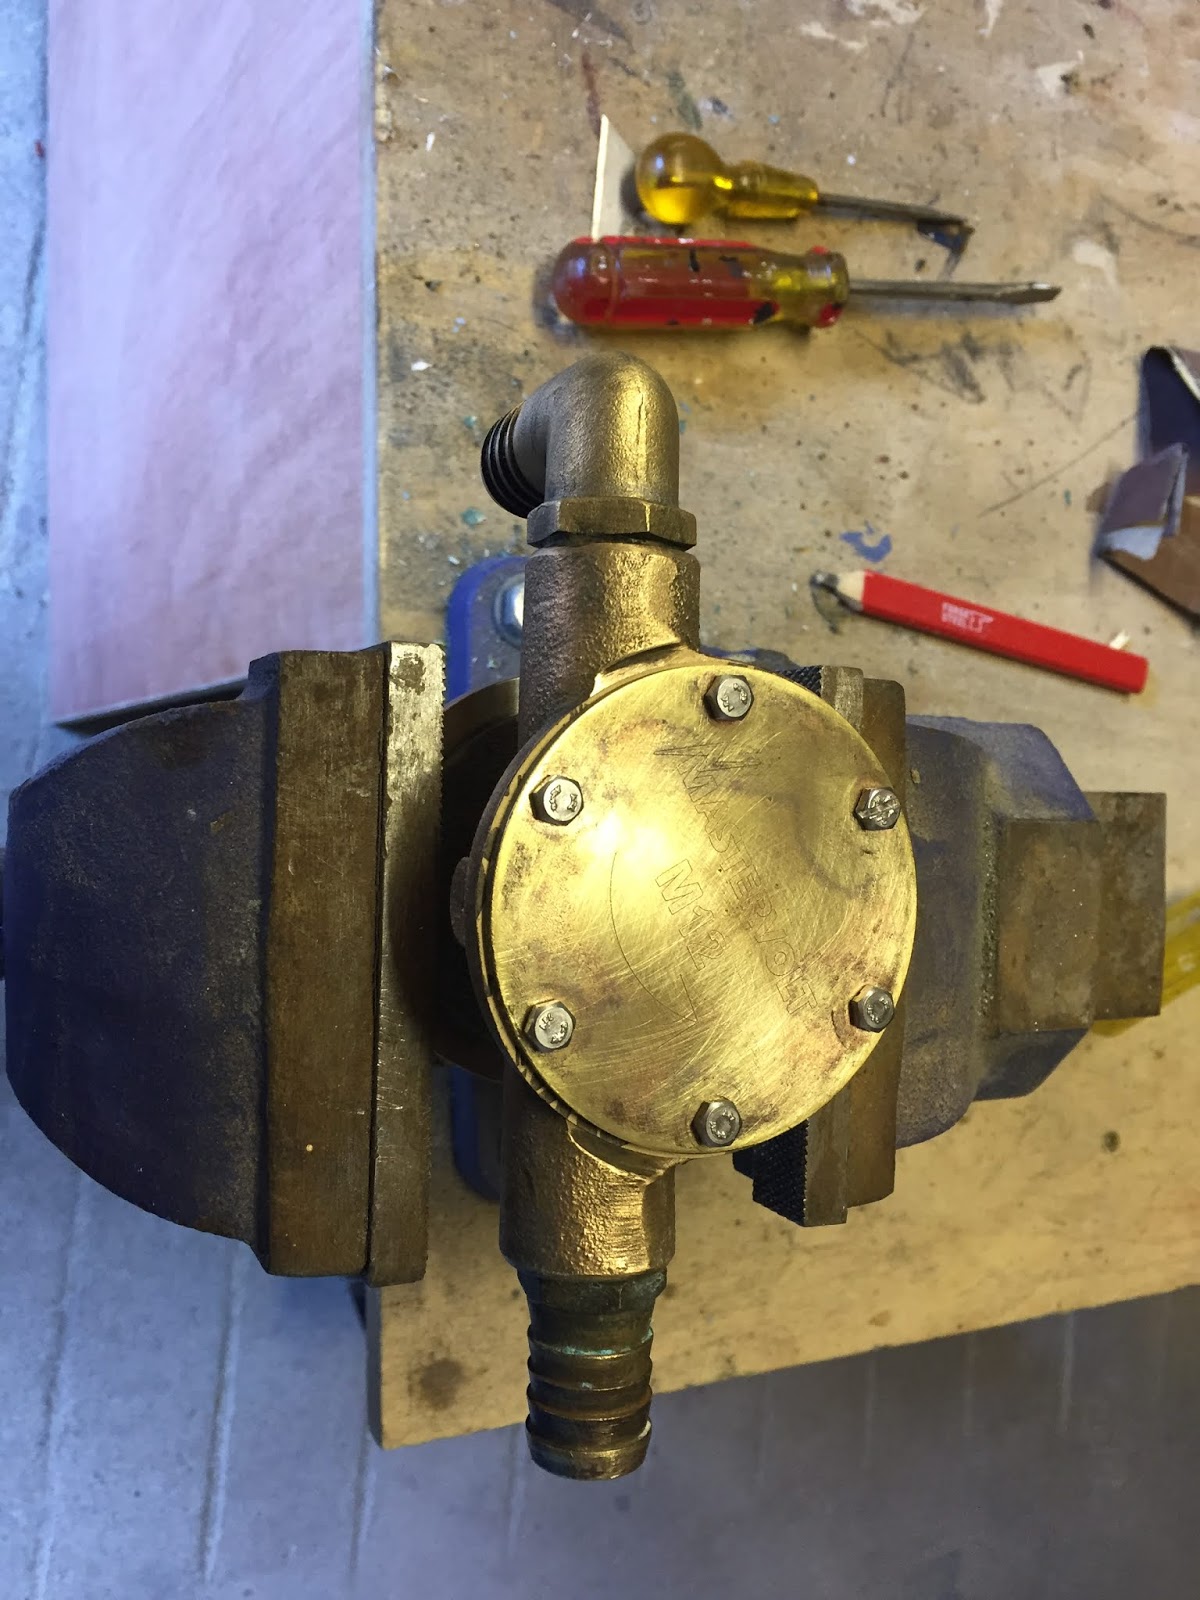
Although the generator looked in great shape overall the raw water pump was leaking. This was removed, cleaned up, and the impeller and seals were replaced and refitted.

Corrosion on the front plate of the pump

Before the clean up

After some TLC
Aircon raw water pump clean up

 The pump sits directly under the engine room external air vent so is open to a barrage of moist salty air. As a result it is susceptible to corrosion. As you can see from the pictures the bleed valve had corroded beyond repair and paint had been eaten away.
The renovated pump with new bleed valve and paint
Other maintenance work
Prop removal and Cutlass bearing change
Although we experienced no appreciable vibration from the prop shaft during our delivery trip, on inspection there was a little more movement between the prop shaft and cutlass bearing than I was content to leave for another season. Since we were planning to do a fair bit of cruising over the coming year I decided we should change it. While the prop was off I took the opportunity to clean it up and antifoul it with Velox.

The hub of the prop was heated in order to help free it from the shaft.
Corrosion in engine compartment


 In general, the boat was in really nice condition when we picked her up. She has been lightly used and well maintained. However, although the engine sits on the centreline of the boat, the remainder of the engine room, housing the generator, aircon unit and a set of through-hull fittings, pumps and pipes is on the starboard side and is also home to the engine room air vent. This allows heavily laden salt air to enter and attack anything that isn't protected.
I removed and replaced all the pipe clips and removed the corrosion from the fittings. I also gave the pipes/hoses a good clean. Having removed all the through-hull fitting levers these were prepped and painted using Hammerite and then sprayed with white grease. We shall see how well, or not, this protects them. Now that everything is cleaned up it should be a fairly simple, routine task to keep it all in good condition.

All clean, free from corrosion and new clamps fitted
All other through-hulls and fittings were in excellent condition and needed no work. Result!
Replace gland packing
The last job before returning Destiny to the water was to change the stuffing box (gland) packing. This should have been a simple process of removing the old and replacing it with new. Not so. The "stuff" in the stuffing box had probably been their since Pontious was a "pilot" and proved very difficult to remove. Having tried numerous tools it eventually relented and the new "stuff" went in without a hitch. Perhaps this too will last another 12 years!!
General maintenance
While she was chocked I antifouled the hull and changed the anodes. We used Hempel Tiger Xtra: it was the easiest antifoul to apply I ever used and we'll see how it stands up over the season. Once Destiny was back in the water I set about servicing all 3 engines - main, wing and generator.
This really did prove to be a very simple and straight forward job. Access was easy and the concerns I'd had previously about being able to "get at stuff" for maintenance and repair really did evaporate. Elling have been clever in placing easily removable panels where you need them for all routine maintenance tasks. Furthermore, they also provide access to anything that might need to be accessed for non-routine maintenance. This is done by utilising screw on panels wherever anything is covered up. Great design and planning.
Service AirCon
I got a guy to come over and check out the AC system. I had read the ancient manual written before the days of simplicity and coherent pros but couldn't get it to work properly. After some faffing about he identified it had been put into a seldom used mode which prevented it from heating. Having reset the controller it fired up instantly and behaved exactly as advertised. Bliss. He was also kind enough to explain the more intricate subtleties of the system so I am now an instant expert!!
Oil pump reverse switch
The main engine has an electric pump operated by a push button which is designed to make life easy during an oil change. A simple press of the button sucks all the old oil out of the engine. No mess and very quick and easy. However, refilling is not as straight forward. The traditional manual method is employed which when trying to lift a 25 litre can of oil in an awkward, restricted position invariably ends up with a mess in the bilge. The picture below shows a simple 3 way switch I wired in so that the pump can be used to fill the engine as well as remove the engine oil. I'm all for making life easy!

New Battery Relay Fitted
The relay that switches the battery charger between the main/house batteries and the engine start batteries failed. It was a simple job to replace. We took the opportunity to beef it up with a Victron Energy Cyrix-ct 12/24v-230A intelligent battery combiner so hopefully we shouldn't have any problems for the foreseeable future.

The relay is the little black box in the centre of the shot.
New battery charger for bow thruster
The bow thruster batteries had been changed just prior to the survey in the belief that they were faulty. It turns out that the charger was at fault. We swapped it out for a nice new model (Victron Blue Power IP65) that you can monitored from your phone. This is handy since it sits behind a panel in the front cabin.
Pic of charger
Fixed leak from steering binnacle
The steering binnacle has leaked slightly leak since we bought the boat. This was another quick fix: remove the steering wheel, take out the binnacle, tighten the hydraulic couplings, put it back together.
Fit a second latch to radar/aerial mount
The aerial/radar platform is latched into position and releasing the latch allows the electronic lowering of the platform to reduce the air draft to 3.45metres. For some reason, there is only one latch located on the port side of the platform. This results in the platform lying out of square when the latch is engaged. To remedy this I fitted another latch on the starboard side of the platform.

The starboard side of the platform didn't sit flush with the frame
Fitting another latch solved the problem

Fitted new microwave
There was no microwave on board when we bought the boat but the wiring and space was available.

Fix leak from sliding roof
I came back to the boat after some heavy rain and found that water had been running down the outside of the electrical panel - not good news! It turned out that the pipe which drains the channel the roof rails sit in had broken free from the gutter. Reapplying the sealant quickly fixed the problem.
Pic of fix
Sowing!
The bimini had just been replaced before we bought the boat but its cover needed to be repaired along with the cover for the deck table. It's amazing what you can put your mind to when the need arises. Having mastered how to thread the sowing machine (the hardest part), there was no stopping me!
Deck table refurb
On the aft deck sits a 4-piece folding teak deck table. This is a serious piece of kit and probably depleted a rain forest in its making. It was in desperate need or a refurb so I took it back to my workshop, rubbed it down and coated it in Oslo oil that provides excellent UV protection. It now looks like new.


Key survey results:
Saildrive Leak
The most pressing job was to address a leak that had been identified allowing water into the Saildrive unit - the drive for the wing (back-up) engine. The Saildrive had recently been removed and, on investigation, it appeared the unit had not been properly reassembled.
 |
| An oil leak from the base of the Saildrive indicated all was not well during the survey |

Here you can see the the gasket, in green, is fitted 180 degs out of position.
The company who carried out the original work admitted the "engineer" who did the job had since left!
Fortunately, no more damage occurred as a result of the water ingress.

While the Saildrive was out I took the opportunity to clean up and antifoul
the folding prop using Velox primer and 2 top coats in black.
The last 2 pictures show what a little TLC and time can do


As with many jobs on boats, you solve one problem and another arises. In order to remove the Saildrive the wing engine had to be move forward. In doing this we noticed some corrosion on the heat exchanger where it meets the exhaust elbow. Sadly this was not picked up on the survey. Examination confirmed our fears that the heat exchanger and elbow needed replacing. This was duly done and, for good measure, I also changed the exhaust muffler whose drain plug had been broken off and been glued into place. Perhaps a reason why the heat exchanger corroded!
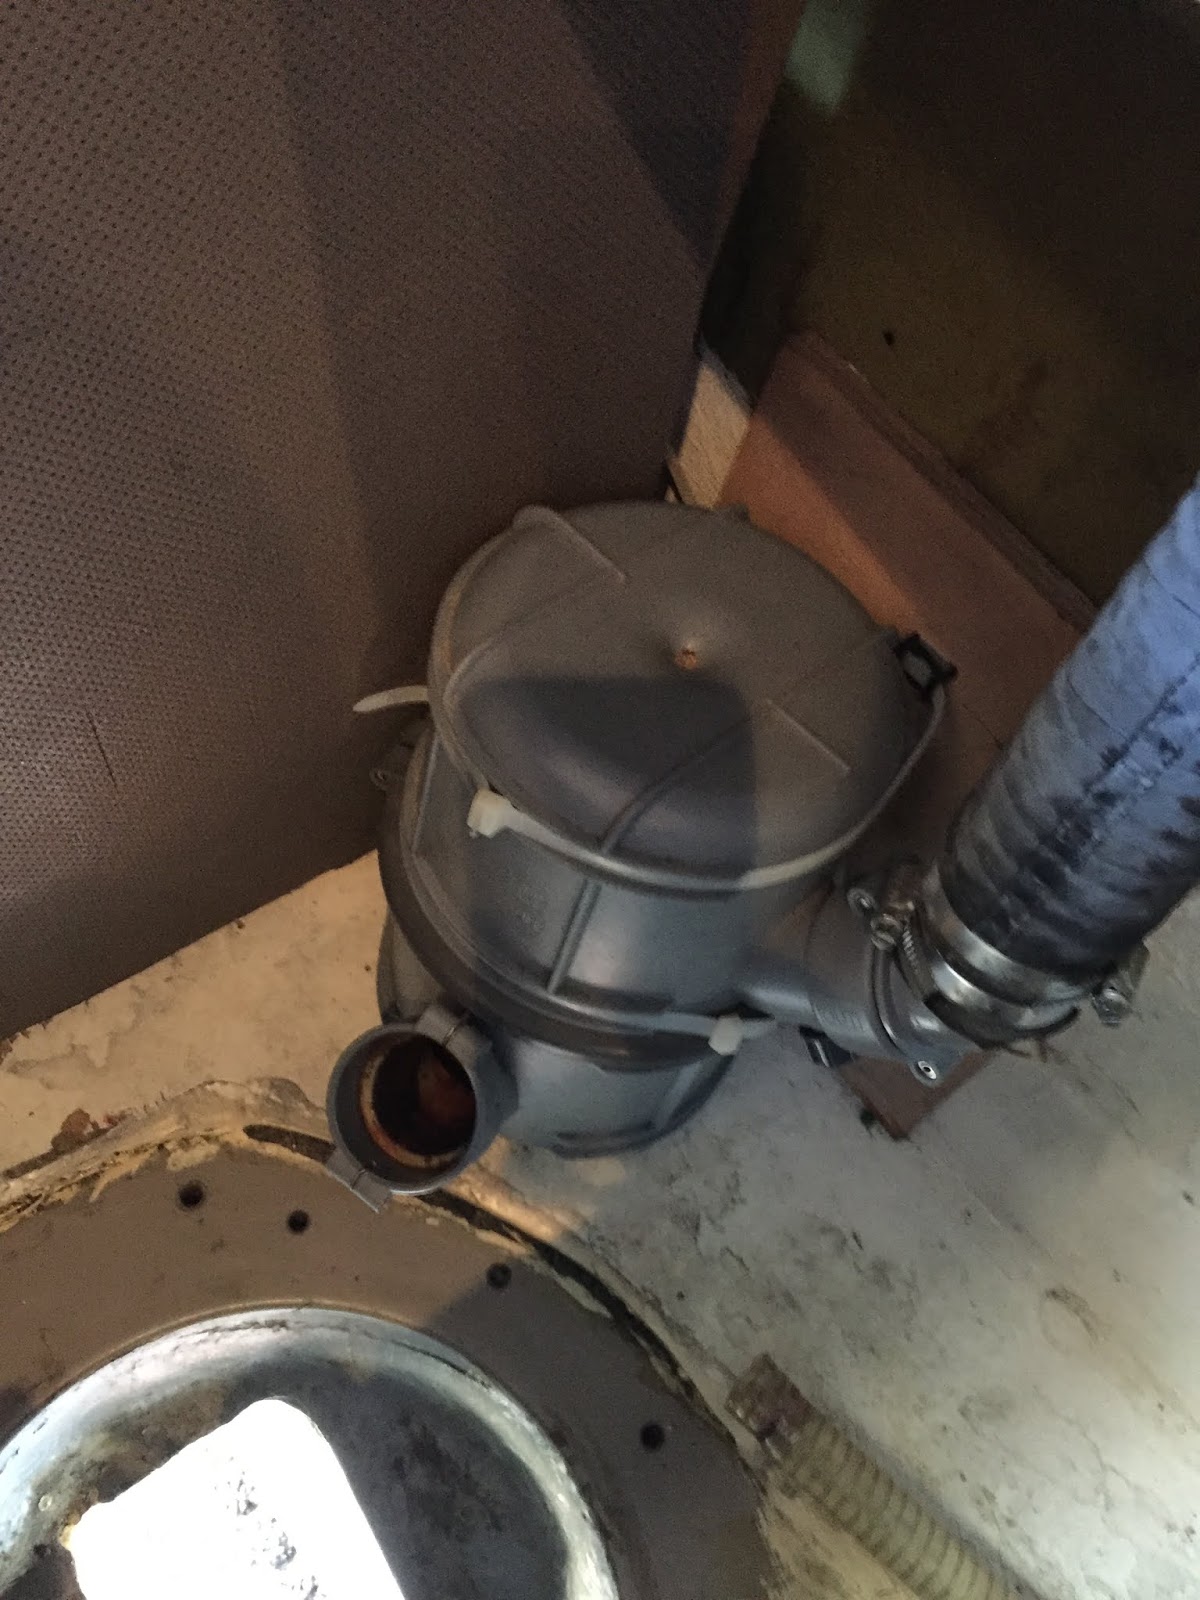 |
| The damaged muffler |
Generator tidy up
Although the generator looked in great shape overall the raw water pump was leaking. This was removed, cleaned up, and the impeller and seals were replaced and refitted.

Corrosion on the front plate of the pump
 |

Before the clean up
 |

After some TLC
Aircon raw water pump clean up

 The pump sits directly under the engine room external air vent so is open to a barrage of moist salty air. As a result it is susceptible to corrosion. As you can see from the pictures the bleed valve had corroded beyond repair and paint had been eaten away.
The renovated pump with new bleed valve and paint

Other maintenance work
Prop removal and Cutlass bearing change
Although we experienced no appreciable vibration from the prop shaft during our delivery trip, on inspection there was a little more movement between the prop shaft and cutlass bearing than I was content to leave for another season. Since we were planning to do a fair bit of cruising over the coming year I decided we should change it. While the prop was off I took the opportunity to clean it up and antifoul it with Velox.

 |
| Prop off |
 |
| Cutlass removed |
 |
| Prop ready for re-fitting |


 In general, the boat was in really nice condition when we picked her up. She has been lightly used and well maintained. However, although the engine sits on the centreline of the boat, the remainder of the engine room, housing the generator, aircon unit and a set of through-hull fittings, pumps and pipes is on the starboard side and is also home to the engine room air vent. This allows heavily laden salt air to enter and attack anything that isn't protected.
Here are a selection of the worst affected pieces.

All clean, free from corrosion and new clamps fitted
All other through-hulls and fittings were in excellent condition and needed no work. Result!
Replace gland packing
The last job before returning Destiny to the water was to change the stuffing box (gland) packing. This should have been a simple process of removing the old and replacing it with new. Not so. The "stuff" in the stuffing box had probably been their since Pontious was a "pilot" and proved very difficult to remove. Having tried numerous tools it eventually relented and the new "stuff" went in without a hitch. Perhaps this too will last another 12 years!!
General maintenance
While she was chocked I antifouled the hull and changed the anodes. We used Hempel Tiger Xtra: it was the easiest antifoul to apply I ever used and we'll see how it stands up over the season. Once Destiny was back in the water I set about servicing all 3 engines - main, wing and generator.
This really did prove to be a very simple and straight forward job. Access was easy and the concerns I'd had previously about being able to "get at stuff" for maintenance and repair really did evaporate. Elling have been clever in placing easily removable panels where you need them for all routine maintenance tasks. Furthermore, they also provide access to anything that might need to be accessed for non-routine maintenance. This is done by utilising screw on panels wherever anything is covered up. Great design and planning.
Service AirCon
I got a guy to come over and check out the AC system. I had read the ancient manual written before the days of simplicity and coherent pros but couldn't get it to work properly. After some faffing about he identified it had been put into a seldom used mode which prevented it from heating. Having reset the controller it fired up instantly and behaved exactly as advertised. Bliss. He was also kind enough to explain the more intricate subtleties of the system so I am now an instant expert!!
Oil pump reverse switch
The main engine has an electric pump operated by a push button which is designed to make life easy during an oil change. A simple press of the button sucks all the old oil out of the engine. No mess and very quick and easy. However, refilling is not as straight forward. The traditional manual method is employed which when trying to lift a 25 litre can of oil in an awkward, restricted position invariably ends up with a mess in the bilge. The picture below shows a simple 3 way switch I wired in so that the pump can be used to fill the engine as well as remove the engine oil. I'm all for making life easy!

The relay that switches the battery charger between the main/house batteries and the engine start batteries failed. It was a simple job to replace. We took the opportunity to beef it up with a Victron Energy Cyrix-ct 12/24v-230A intelligent battery combiner so hopefully we shouldn't have any problems for the foreseeable future.

The relay is the little black box in the centre of the shot.
New battery charger for bow thruster
The bow thruster batteries had been changed just prior to the survey in the belief that they were faulty. It turns out that the charger was at fault. We swapped it out for a nice new model (Victron Blue Power IP65) that you can monitored from your phone. This is handy since it sits behind a panel in the front cabin.
Pic of charger
Fixed leak from steering binnacle
The steering binnacle has leaked slightly leak since we bought the boat. This was another quick fix: remove the steering wheel, take out the binnacle, tighten the hydraulic couplings, put it back together.
Fit a second latch to radar/aerial mount
The aerial/radar platform is latched into position and releasing the latch allows the electronic lowering of the platform to reduce the air draft to 3.45metres. For some reason, there is only one latch located on the port side of the platform. This results in the platform lying out of square when the latch is engaged. To remedy this I fitted another latch on the starboard side of the platform.

The starboard side of the platform didn't sit flush with the frame
Fitting another latch solved the problem

Fitted new microwave
There was no microwave on board when we bought the boat but the wiring and space was available.

Fix leak from sliding roof
I came back to the boat after some heavy rain and found that water had been running down the outside of the electrical panel - not good news! It turned out that the pipe which drains the channel the roof rails sit in had broken free from the gutter. Reapplying the sealant quickly fixed the problem.
Pic of fix
Sowing!
The bimini had just been replaced before we bought the boat but its cover needed to be repaired along with the cover for the deck table. It's amazing what you can put your mind to when the need arises. Having mastered how to thread the sowing machine (the hardest part), there was no stopping me!
Deck table refurb
On the aft deck sits a 4-piece folding teak deck table. This is a serious piece of kit and probably depleted a rain forest in its making. It was in desperate need or a refurb so I took it back to my workshop, rubbed it down and coated it in Oslo oil that provides excellent UV protection. It now looks like new.


No comments:
Post a Comment